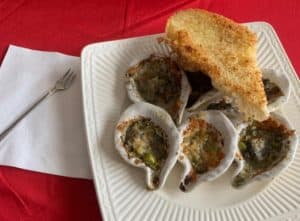
The fall is a season I have always looked forward to. As a child, this is the time my mom always makes delicious oysters that keeps you craving more for days. She is an expert in making delicious meals as such. This love for oysters only grew with time, and today, I often visit various restaurants to try them out. Lets dig into ceramic oyster shells for grilling.
For many, making oyster dishes at home can be quite stressful for all the washing and shucking involved. There could also be issues of toppings slipping off and uneven season when grilling directly in the shell. These issues tend to put off the idea of cooking oysters at home whenever I get the craving for one.
 Fortunately, I stumbled on a product with which you can cook oysters cleanly and quickly. This product was born out of the desire to solve the common problems experienced while cooking oysters. A couple came up with the idea of making oyster shells out of clay and, together with the husband’s brother, formed a company.
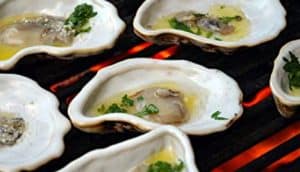
These ceramic oyster shells can be used to grill or Broil Oysters. I have enjoyed quite some Oyster meals using this. Continue reading to find out all you need to know about these ceramic oyster shells and how easy they make the cooking process.
How It All Started
Ali Loftin and her husband loved going on dates together after work, and they would often eat oysters together on these dates. In an interview, Ali mentioned that they often spent more than budgeted during each meal because of how much they loved them. However, knowing how stressful making oysters at home can be, they often resolved to take the financial hit instead.
However, this all changed when Ali’s husband, Kyle, received a call. It was from a man seeking used oyster shells, which he can use to cook fresh oysters. This was the eureka moment for the couple, having come up with an idea for making ceramic oyster shells.
With the help of Kyle’s brother Mike, the trio started making ceramic oyster shells from their garage, learning the basics of what they needed from YouTube. Today, they have an experienced ceramicist handling the core production process as they continue to grow their business.
Benefits Of Ceramic Oyster Shells
You might be wondering, what’s the deal with these ceramic shells? I had this same question before beginning, which was pretty much answered as soon as I tried them out. So let’s take a look at what’s so great about Ceramic oyster shells.
Durability
These shells are made with special flameware that can withstand high temperatures. You are assured of long-term use with this product without cracking or degrading from heat. The shell will evenly distribute heat to cook oysters to your satisfaction properly.
Reusable
One essential quality of kitchen utensils is how reusable they are. For example, you wouldn’t want to keep buying ceramic shells each time you cook oysters. These shells can be washed and reused as much as you want. Furthermore, they’re completely dishwasher safe and can be washed with regular detergent.
Sturdy
Although they are made in the shape of oyster shells, a flat bottom is added to keep them steady on the grill. This will ensure toppings don’t fall off and everything gets cooked together evenly.
 You need to buy already shucked oysters from the local market to get the best of this utensil. This will save you the stress of doing it yourself; all you need to do is prep the oysters and put them into the shells to grill. Then, you can season and garnish to your taste and liking.
Basic Steps Of Ceramic Oyster Shells for Grilling
The following steps will teach you practical ways of using your ceramic shells for grilling oysters.
Step 1 – Make the Sauce
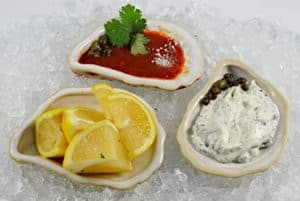
Many love to enjoy their oysters with sauce. If you are part of this crew, you need to get your sauce ready before prepping your oysters. Prepare your sauce according to your preference; we will be using garlic sauce as an example. Get your chili pepper flakes, salt, olive oil, lemon juice, garlic, and butter. Mix olive oil and butter in a pan over medium heat, add the other ingredients, leave them to cook, and then turn off the heat.
Step 2: Prep the Oysters
I personally recommend getting already shucked oysters from the local market. However, if you prefer shucking them yourself, go ahead and get them in the shell; just make sure you get all contents from the oyster into a bowl or bucket.
Step 3: Grill Oysters
Having prepared your sauce and gotten your oysters ready, all you need to do now is the grill. Put oysters into the ceramic oyster shells. Add sauce to each oyster and place on the grill. Cover the grill and let it sit for about 5 minutes. Turn off heat and enjoy your grilled oysters.
Make Cooking Oysters Easier Than Ever!
 Oysters are pretty tasty, especially when cooked the right way, which is why you need to make them yourself at home. Thankfully, you can finally bid farewell to the messy and stressful oyster cooking process with these helpful ceramic oyster shells. Loftin Oysters have available for you their ceramic oyster shells, which do a fantastic job in grilling your oysters.
Looking for a set of your own? You can visit Loftin’s website online, where you can find all of their products, and even several tasty oyster recipes you can put to use.
